Setup Database
The primary database used in Alpaca Stack is PostgreSQL, the standard in the industry. Also Prisma is used for the ORM, which simplifies the setup and makes it quick and easy to get started.
While there are many managed and unmanaged database solutions available, the setup described below is my preferred method for getting something up and running asap at an afforable cost.
Video Tutorial
Setup PostgreSQL with neon.tech
In this video I go over how to setup the PostgreSQL database using Neon.tech for the Alpaca Stack Boilerplate Template.
Setup Database Client (Optional)
In this video I show you how to setup your local database client so you don't have to deal with those clunky watered down web apps when managing databases.
Written Tutorial
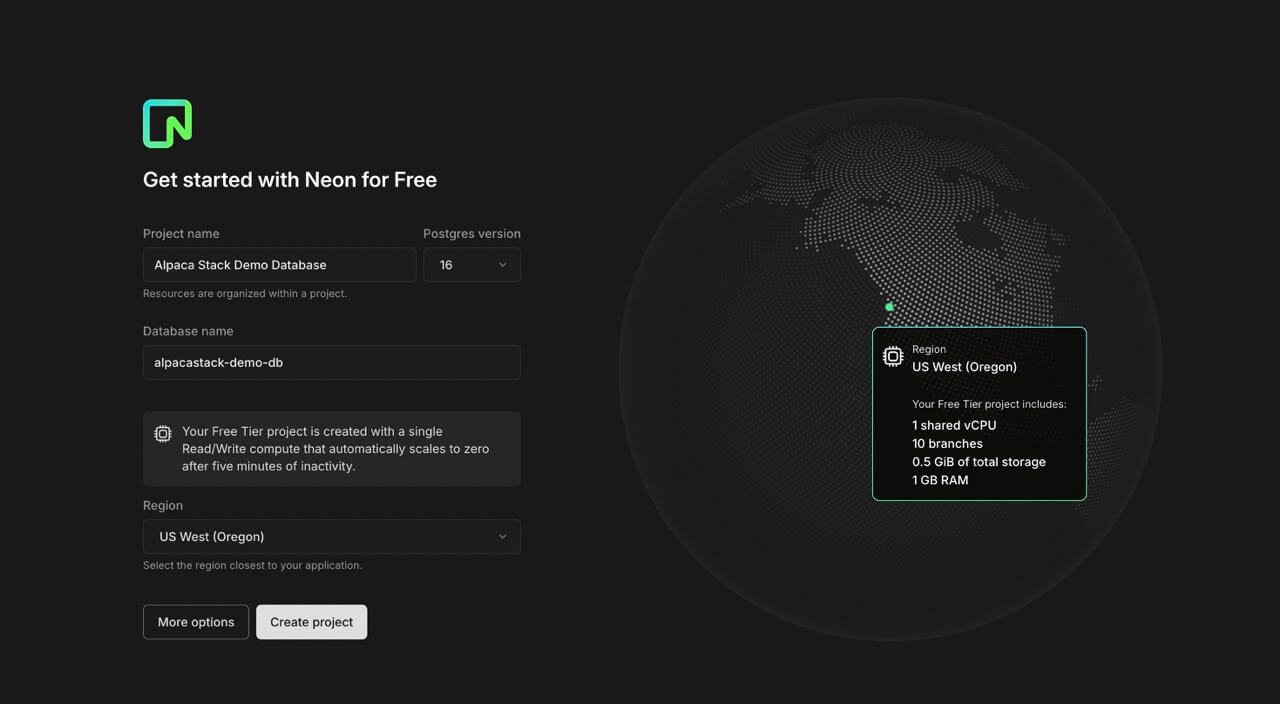
1. Sign Up for Neon
In this tutorial, we will set up the database using Neon, which offers a straightforward pricing structure and an easy-to-use interface. However, you are free to use any other PostgreSQL solution, such as Supabase, or even host your own using Hetzner and Coolify.
Getting started with Neon:
- Register or log in to Neon.
- In the projects dashboard, click Create New Project.
2. Copy the PSQL URL
- After creating your database, under Connection Details, copy the Connection String.
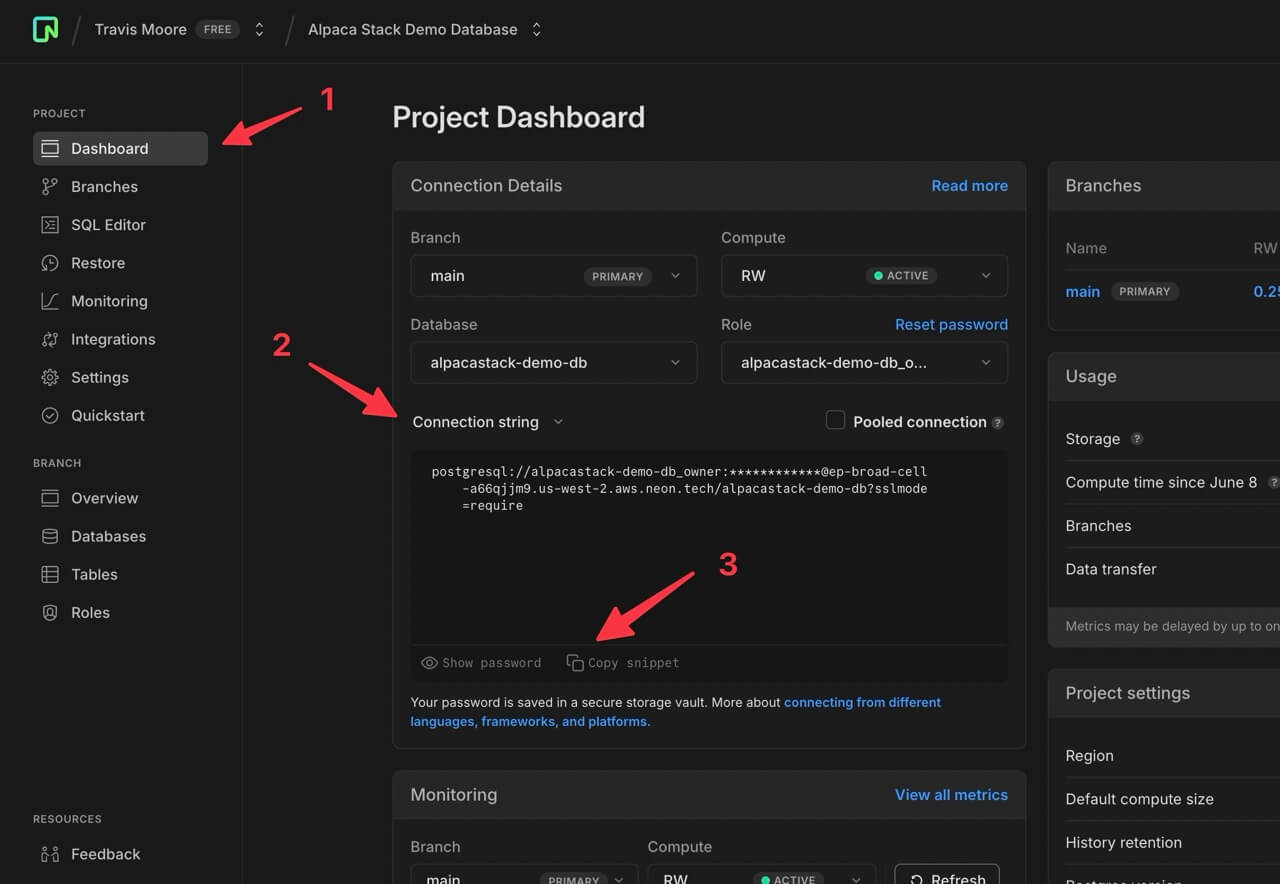
3. Paste the Connection String into the .env File
- In your app's .env file, locate the
DATABASE_URLandDIRECT_URLvariables, and paste the same connection string into both.
Explanation of url and directUrl in the Prisma schema:
- url:
- This is the main connection string that Prisma uses to connect to your database. It includes the database type, username, password, host, port, and database name.
- directUrl:
- This optional field can be used to provide a direct connection URL to the database server, bypassing any load balancers or proxies specified in the main url.
- It can be useful for operations like migrations or specific read/write operations that require a direct connection.
4. Generate the Prisma Client
- After adding the connection strings to your .env file, open your terminal and navigate to your application's root folder. Run the command
npx prisma generate(ignore any notifications about upgrading. This may break authentication. Upgrade at your own risk).
5. Create Database Tables
- After generating the Prisma client, run
npx prisma db pushto allow Prisma to create the tables in the database as defined in your Prisma schema (/prisma/schema.prisma).
6. Check the Database and Tables
- After successfully running the command, your database should now be in sync with the Prisma schema. Go back to Neon (or your chosen database solution) to verify that the tables have been created. The tables will initially be empty, but they should now exist.
7. About Prisma ORM and Its Files
The application is set up to use Prisma ORM.
Prisma is an open-source ORM (Object-Relational Mapping) tool that simplifies database management and access in modern applications. It provides a type-safe database client, a powerful migration system, and a declarative data modeling language. Prisma supports multiple databases, including PostgreSQL, MySQL, SQLite, and MongoDB.