Setup Auth / OAuth
Alpaca Stack comes with built-in user authentication using NextAuth. It supports traditional username and password logins as well as various provider options like Google and GitHub.
Video Tutorial
Setup Next Auth Secret Key
In this video I go over how to generate the Next Auth secret key to use Next Auth in the Alpaca Stack boilerplate template.
Setup Github OAuth
In this video I go over how to setup Github Oath to work with the Alpaca Stack boilerplate template.
Setup Google OAuth
In this video I go over how to setup Github Oath to work with the Alpaca Stack boilerplate template.
Written Tutorial
About NextAuth
What: NextAuth.js is a comprehensive open-source authentication solution for Next.js applications. It offers a straightforward and secure way to add user authentication and authorization, supporting a wide range of authentication providers (e.g., Google, GitHub, Facebook) along with email/password and custom authentication strategies.
Why: Building authentication from scratch can be complicated and time-consuming. NextAuth.js simplifies this by providing a highly configurable and extensible system, reducing development time while ensuring robust security. This allows developers to focus on building core features of their applications rather than dealing with authentication complexities.
Given its complexity, this boilerplate template includes NextAuth to ease the setup process. For more details, refer to the official documentation here.
Setup Next Auth Auth Secret Key
To set up the default username and password login with NextAuth, follow these steps:
- Open your terminal and run the command:
$ openssl rand -base64 32. This generates a secure key. - Copy the generated key and paste it into the
AUTH_SECRETenvironment variable in your.envfile.
Setup OAuth Providers (Optional)
NextAuth allows you to integrate multiple login providers like Google, Facebook, and GitHub, making it easy to add login buttons for each provider.
Turning off Oauth
If you do not want users to register or login with OAuth like Github or Google, then you can easily hide it on the from displaying on the forms by heading over to the registration and login auth components and delete the code that says 'showSocial'
const RegisterPage = () => {
    return (
        <div>
            <CardWrapper
                title="Account Registration"
                subtitle="This is where the journey begins!"
                backButtonLabel="Already have an account? Sign in here!"
                backButtonHref="/login"
                showSocial //remove this line or change to showSocial={false}
            >
                <RegisterForm />
            </CardWrapper>
        </div>
    )
}
const LoginPage = () => {
    return (
        <div>
            <CardWrapper
                title="Login"
                subtitle="Welcome back"
                backButtonLabel="Don't have an account? Sign up!"
                backButtonHref="/register"
                showSocial //remove this line or change to showSocial={false}
            >
                <LoginForm />
            </CardWrapper>
        </div>
    )
}
Setup Github OAuth
This will enable users to register and sign in to your app using Github login credentials on your website.
- Register and Sign in to Github
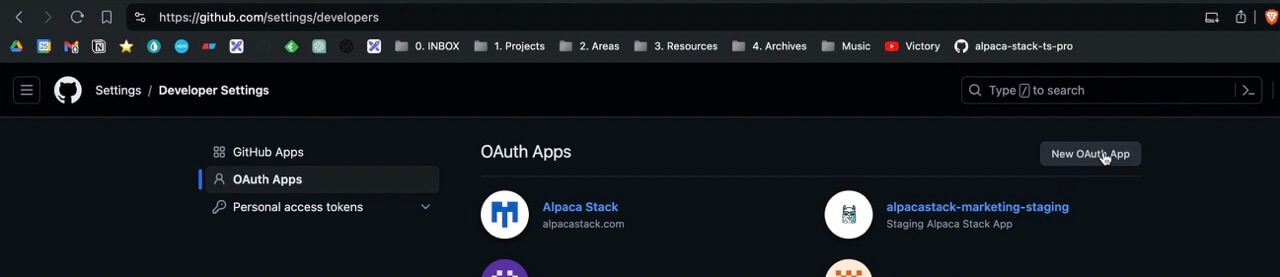
- Settings > Developer Settings
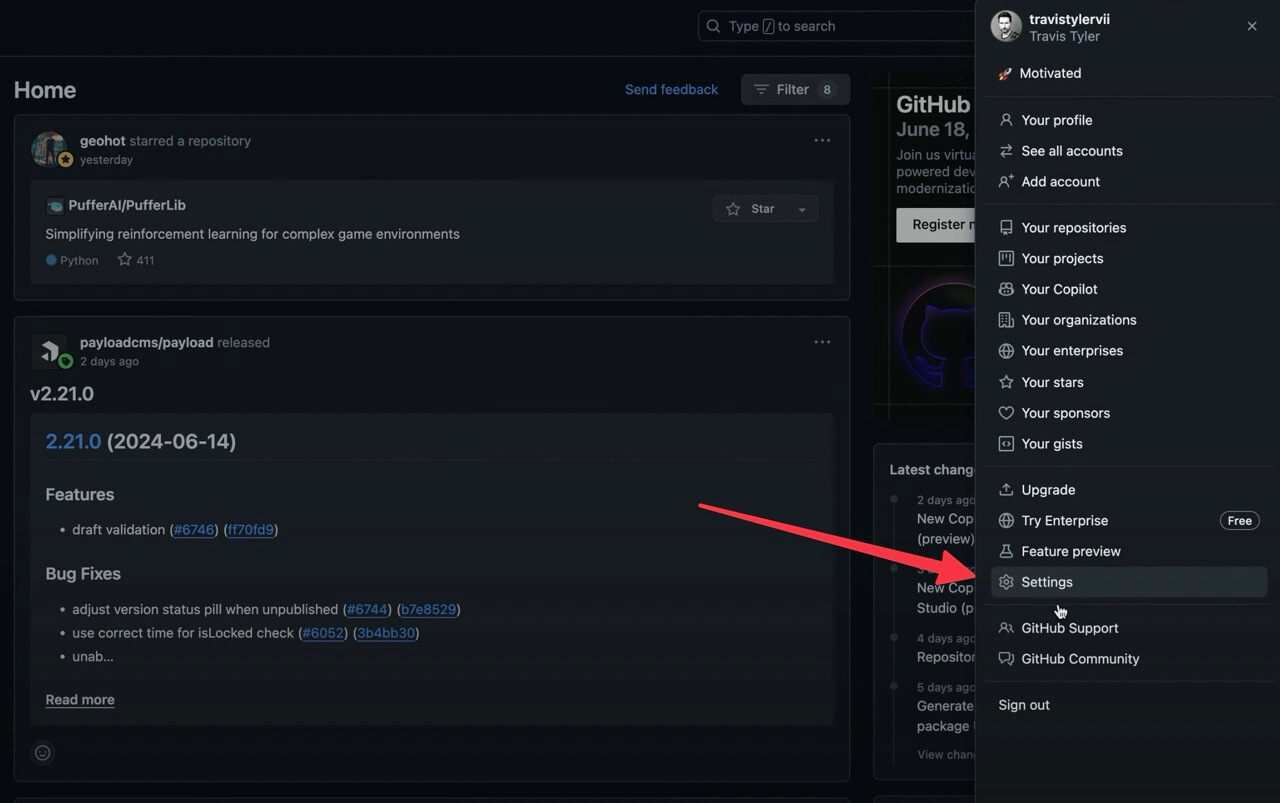
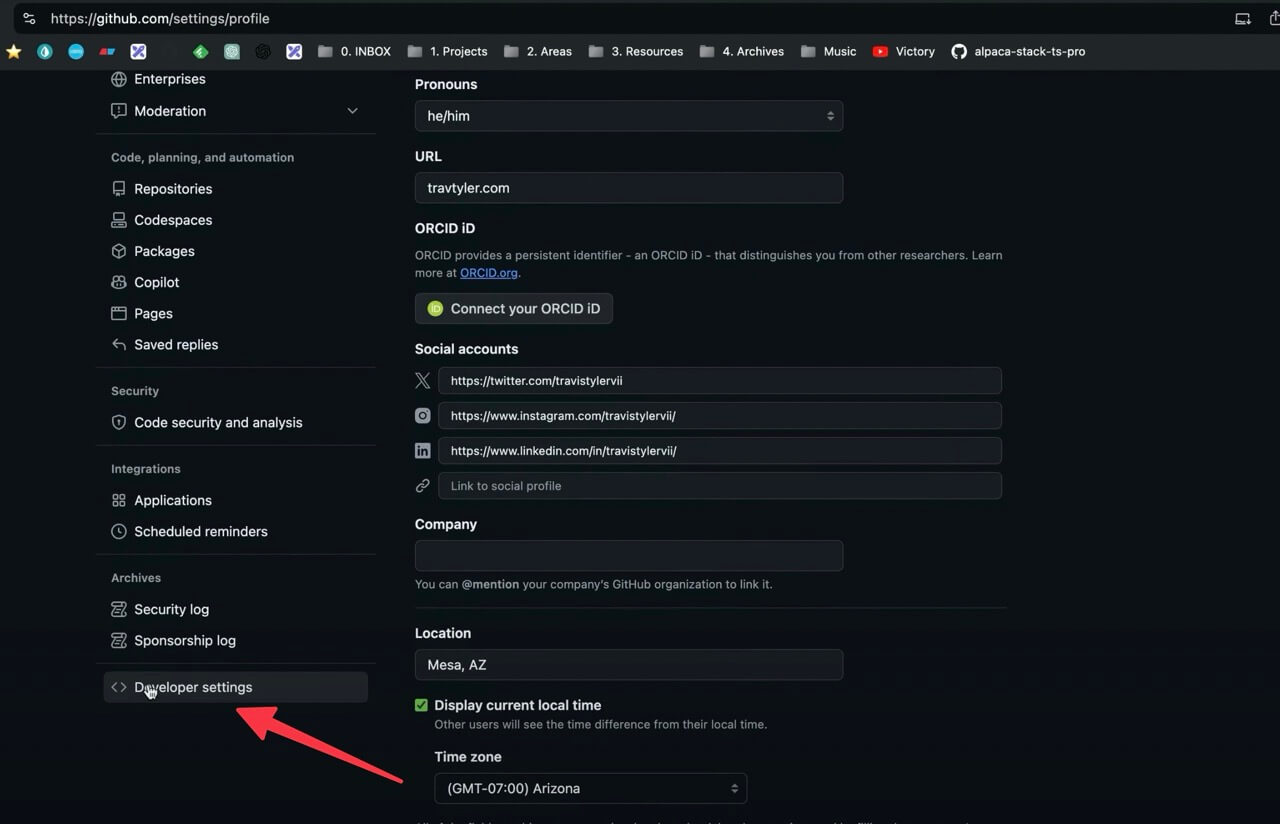
- OAuth Apps > New OAuth App
- Register a new OAuth Application
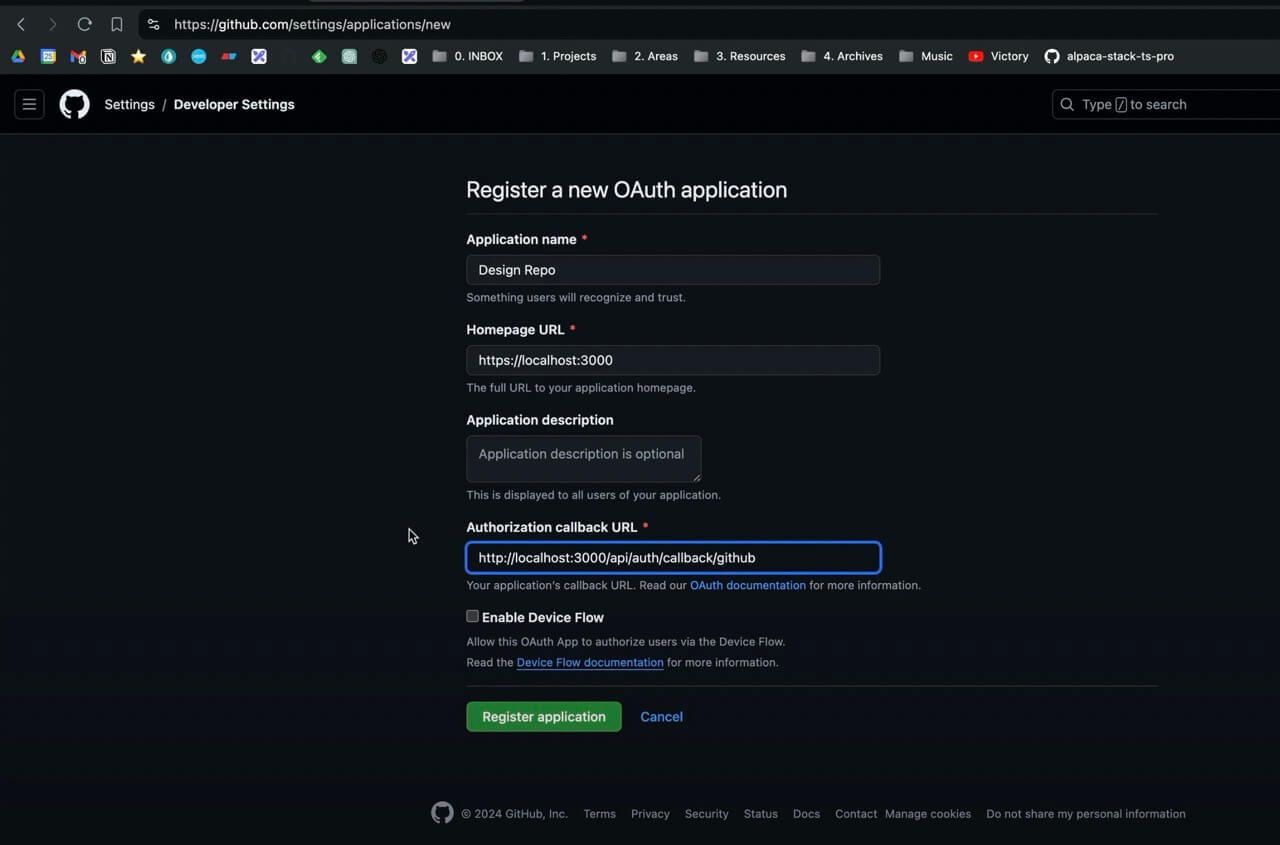
- Callback URL:
- Dev Url:
http://localhost:3000/api/auth/callback/github - Production Url:
http://yourwebsite.com/api/auth/callback/github
- Dev Url:
-
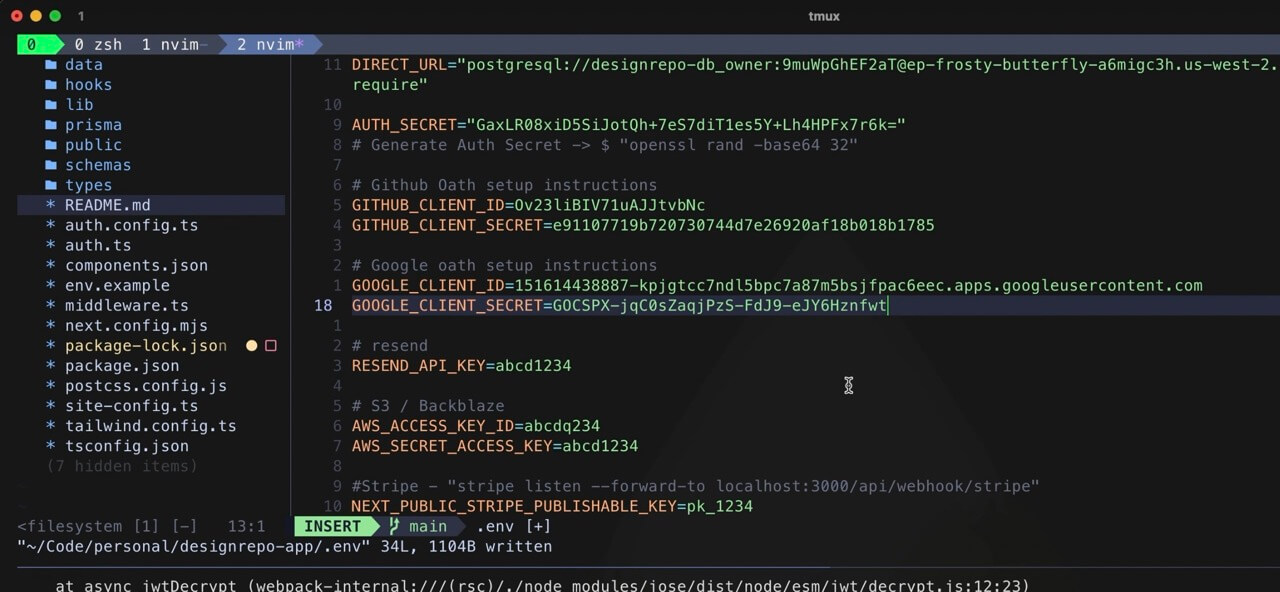
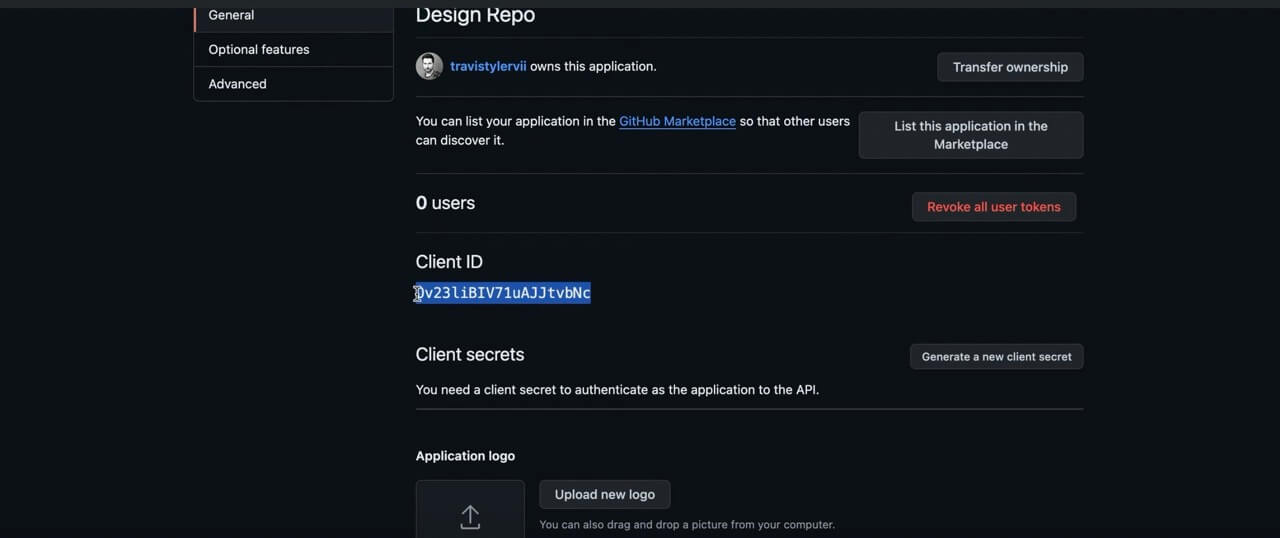
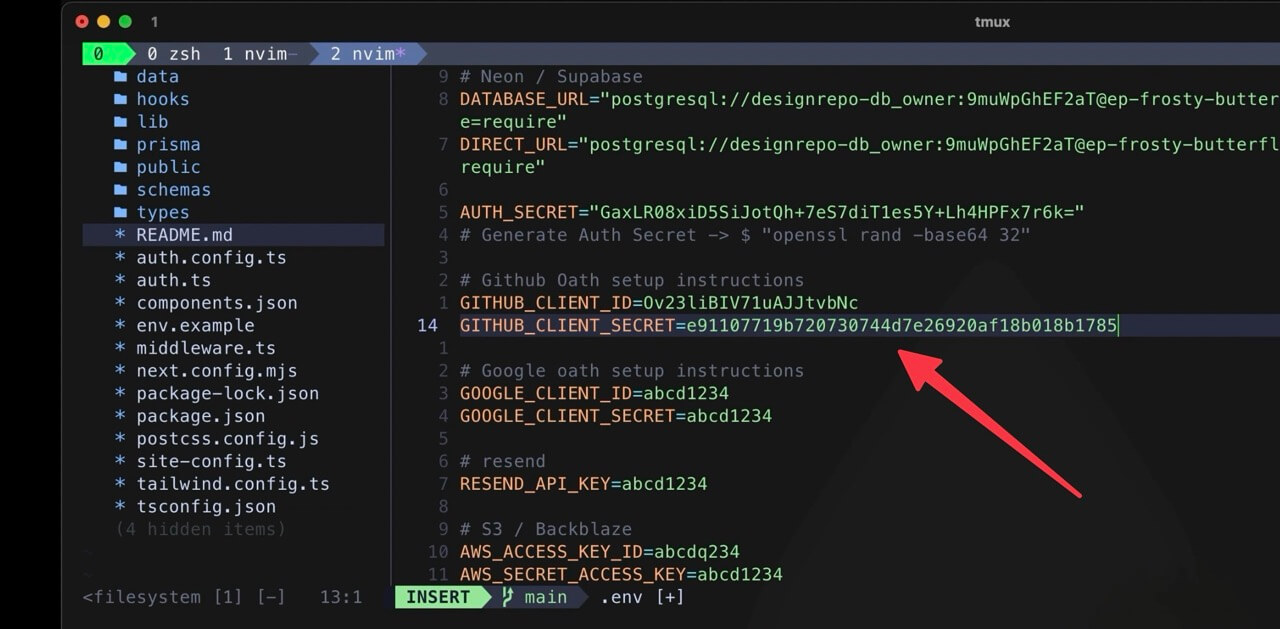
Copy and paste Client ID to "GITHUB_CLIENT_ID"

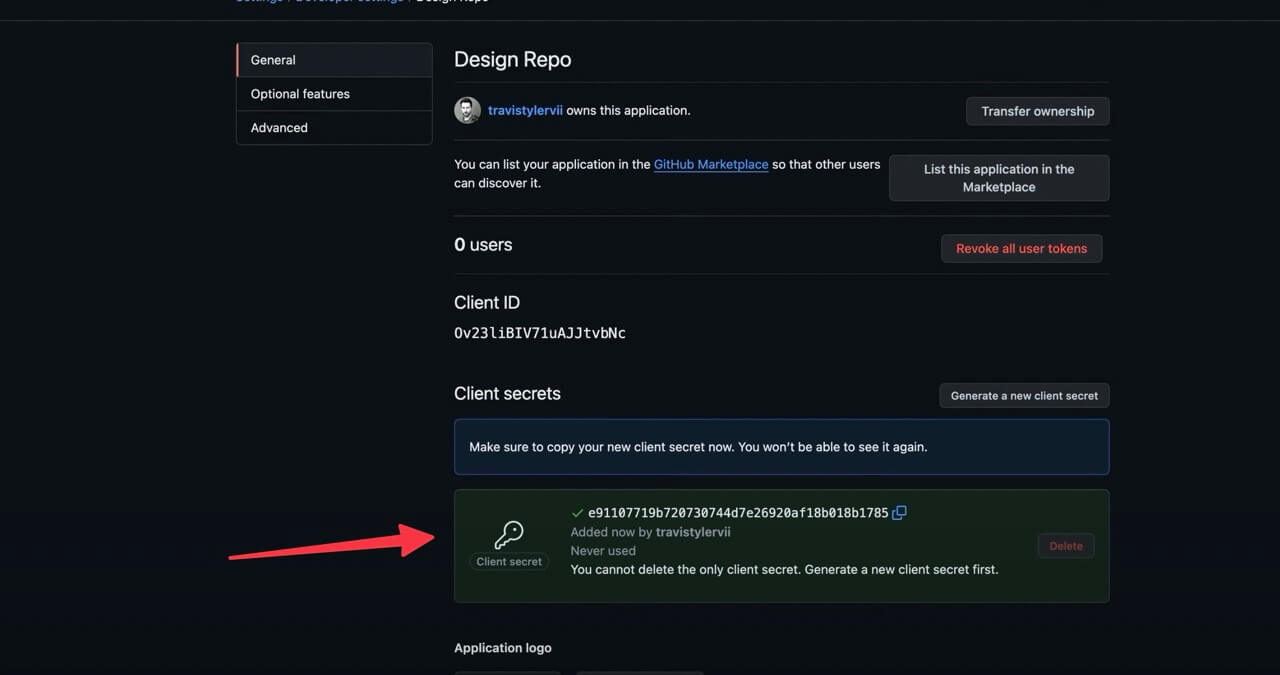
-
Copy and paste Client Secret to GITHUB_CLIENT_SECRET"
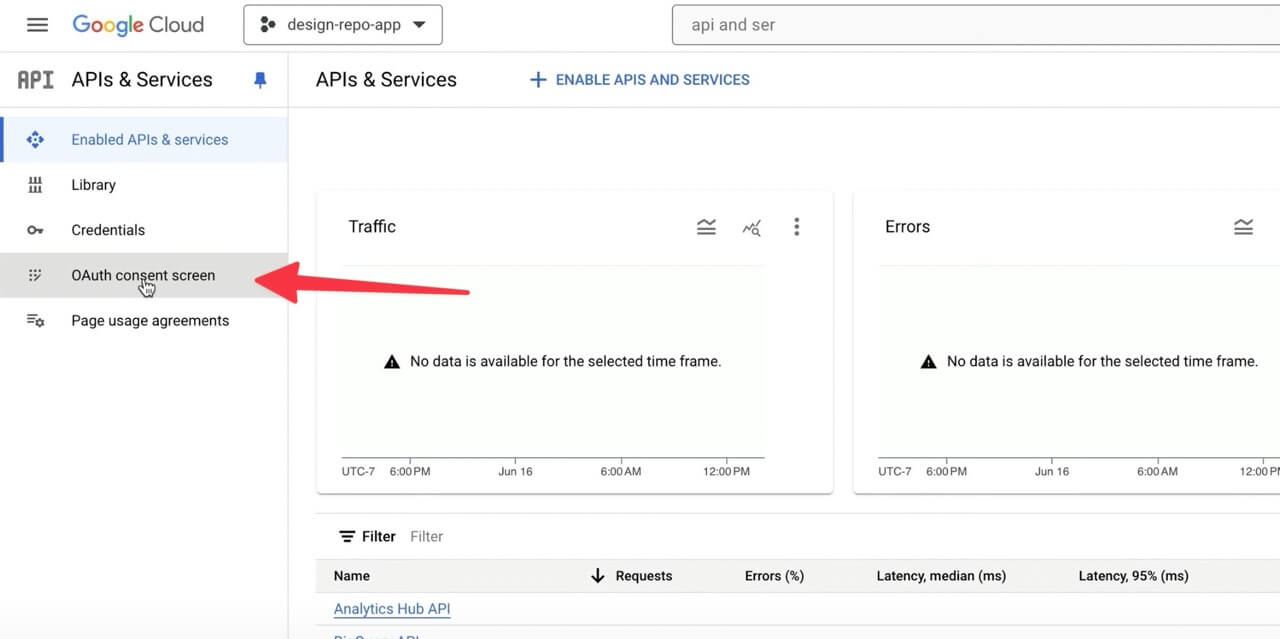
Setup Google OAuth
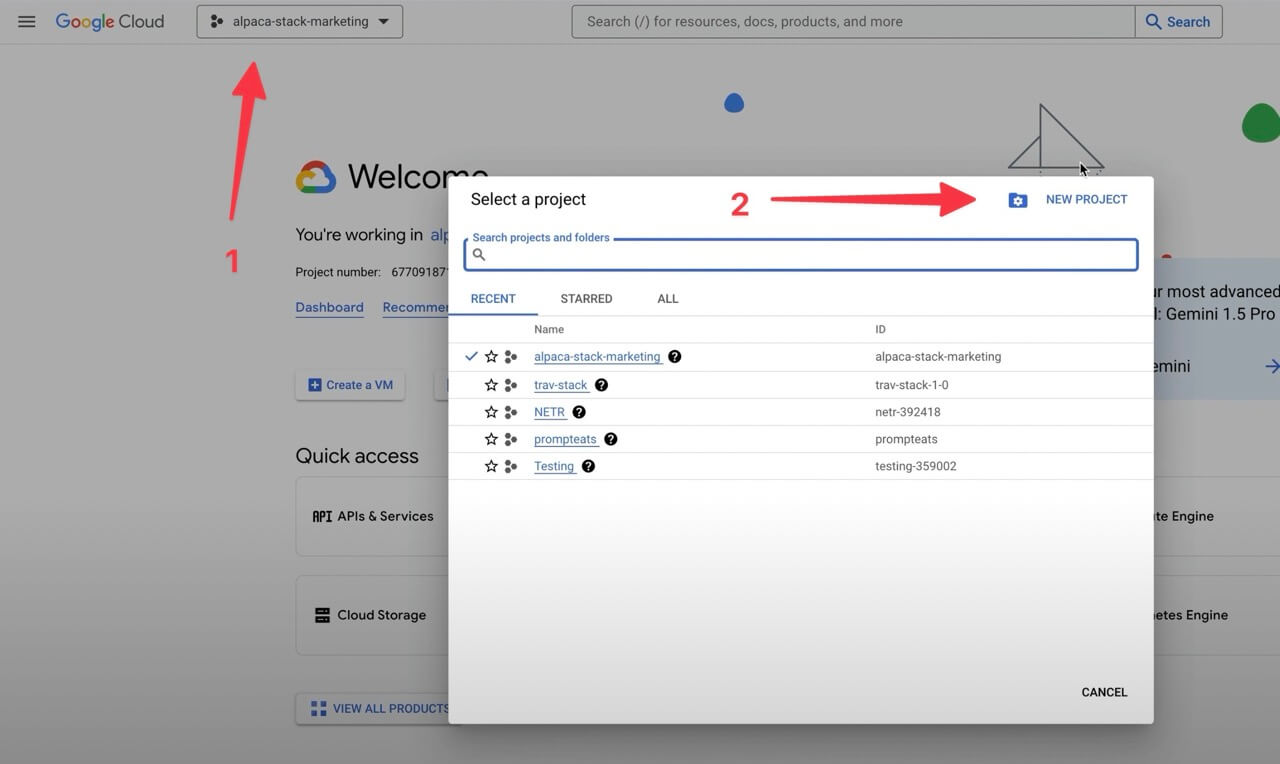
- Register and Sign in to Google Cloud Console
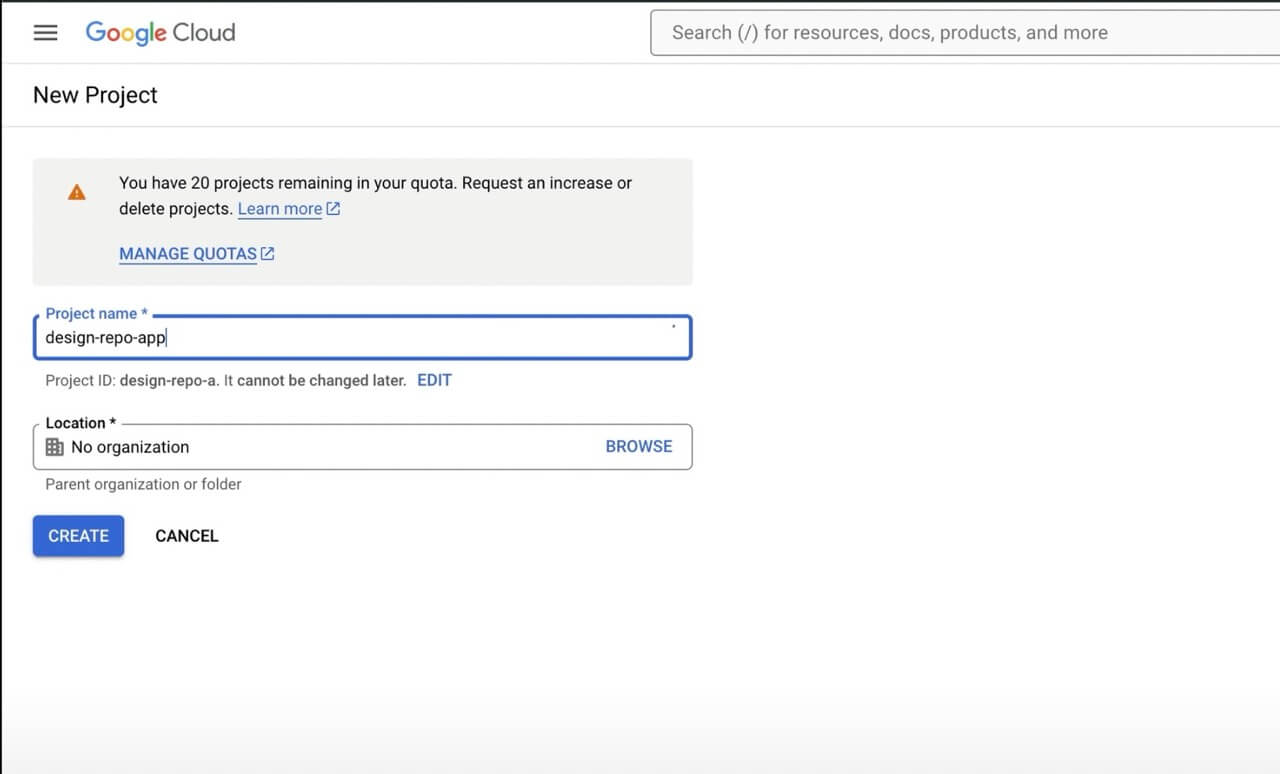
- Create Project
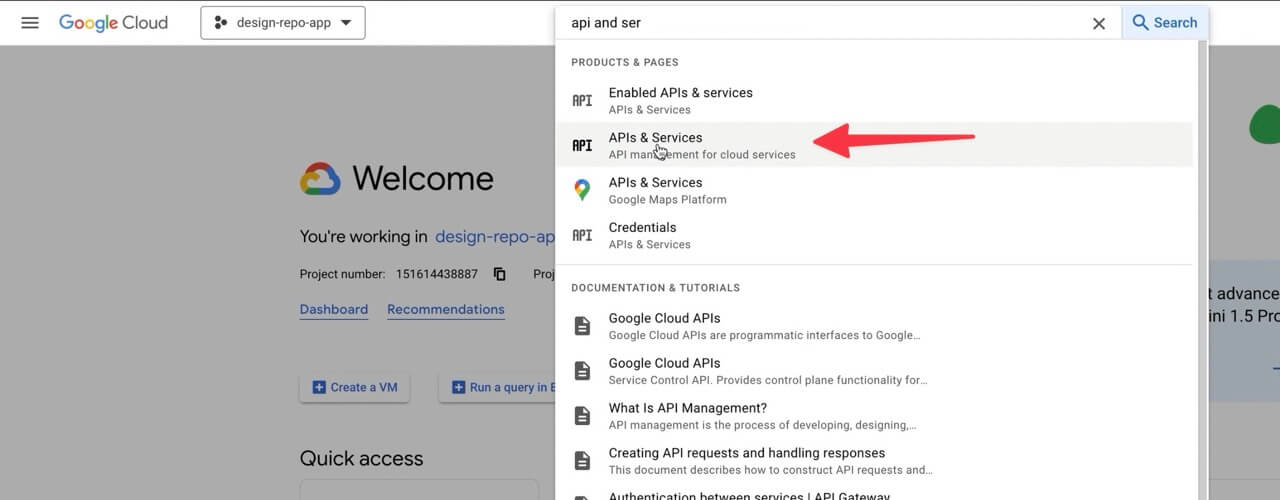
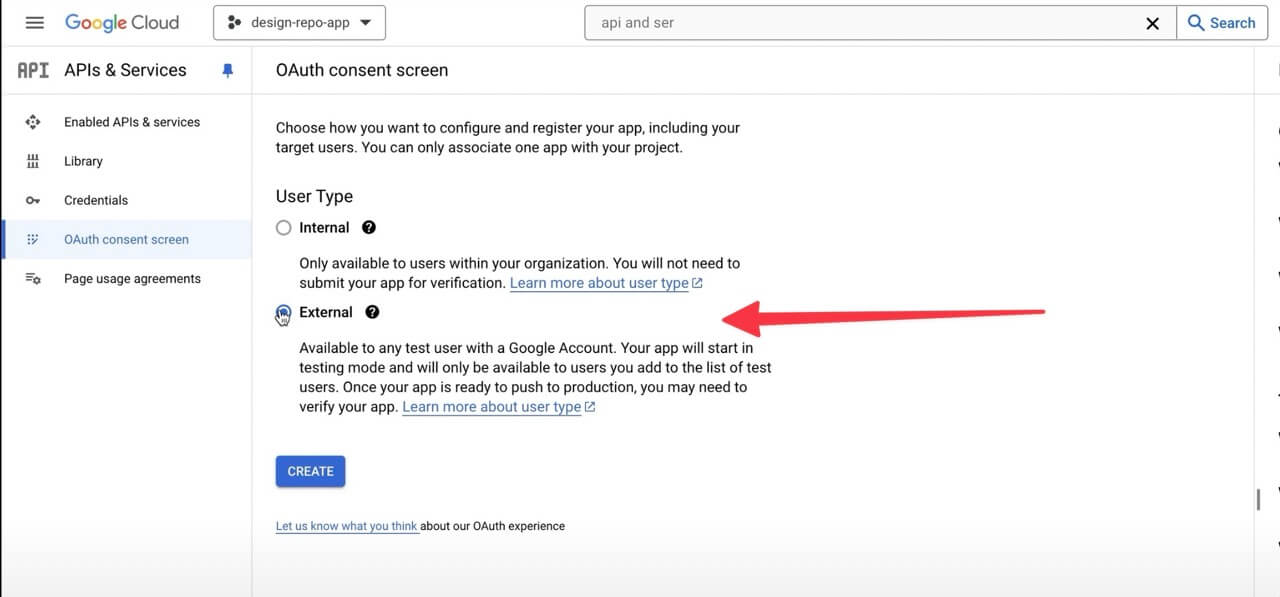
- Api & Services > OAuth consent screen
- Create "External" config
- App information
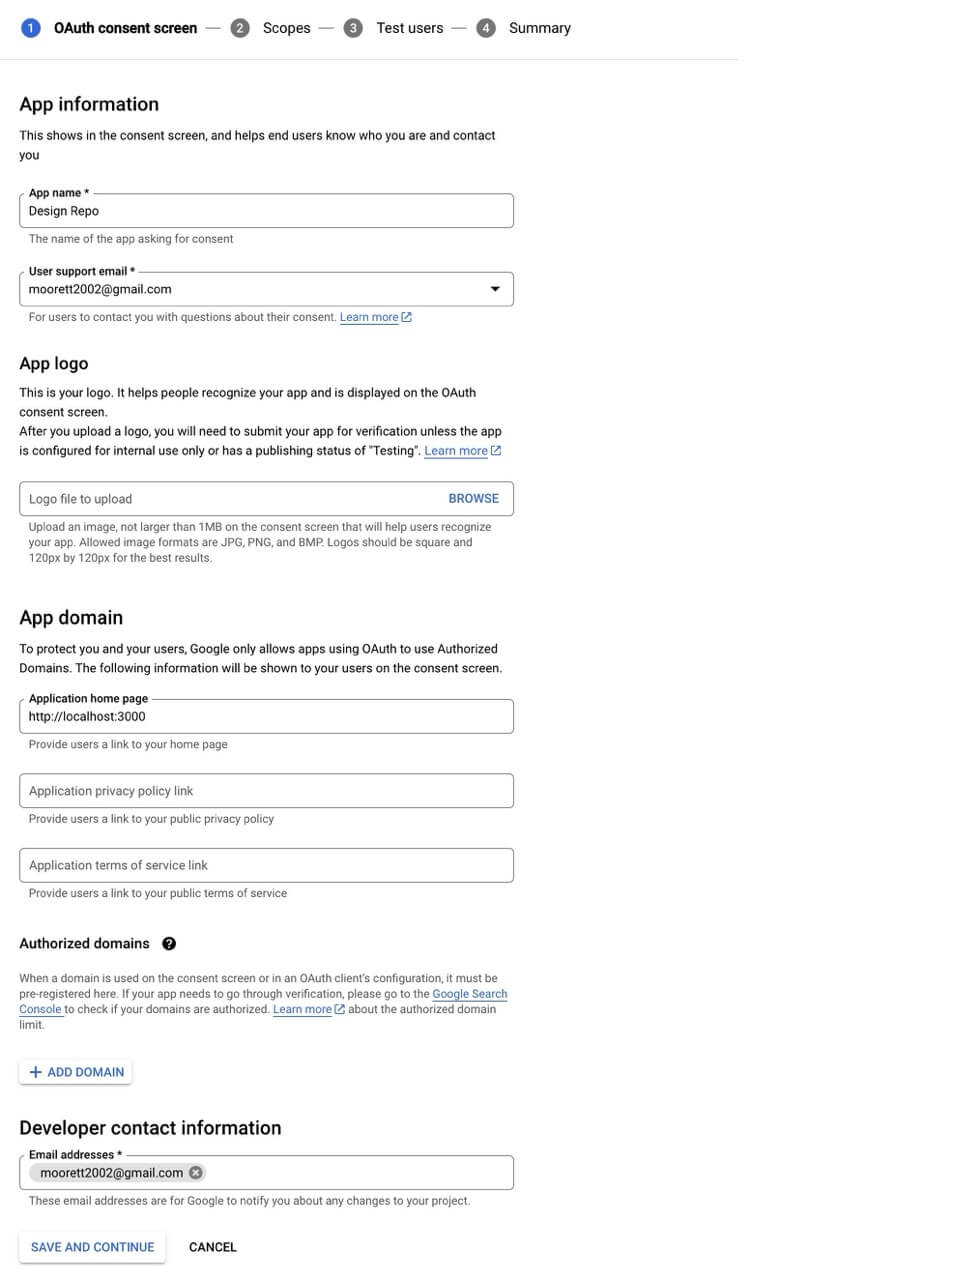
- Required fields:
- App name: Your app name
- App domain (homepage): Your app homepage url
- Developer contact information: Your email
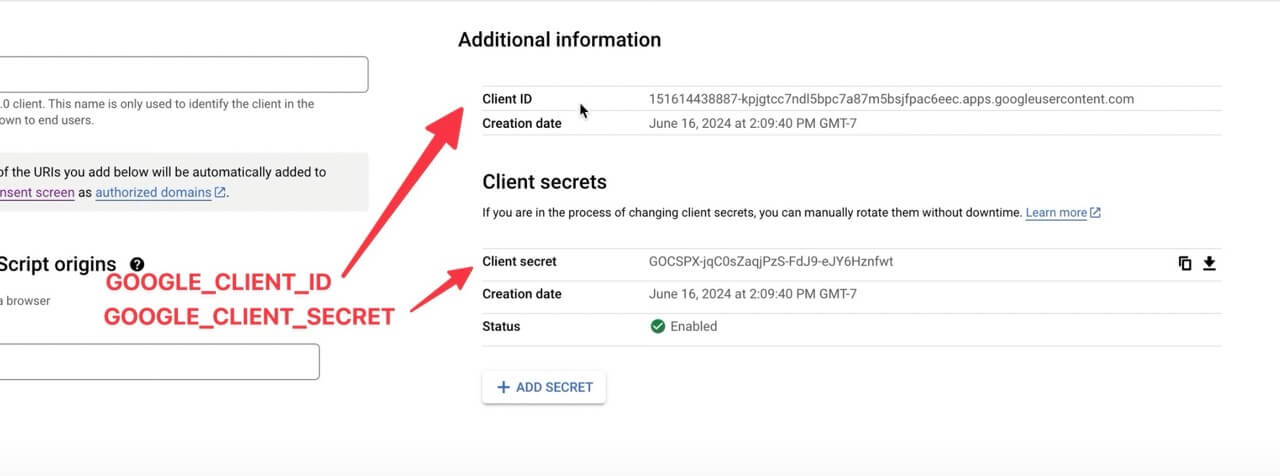
- Create OAuth client ID
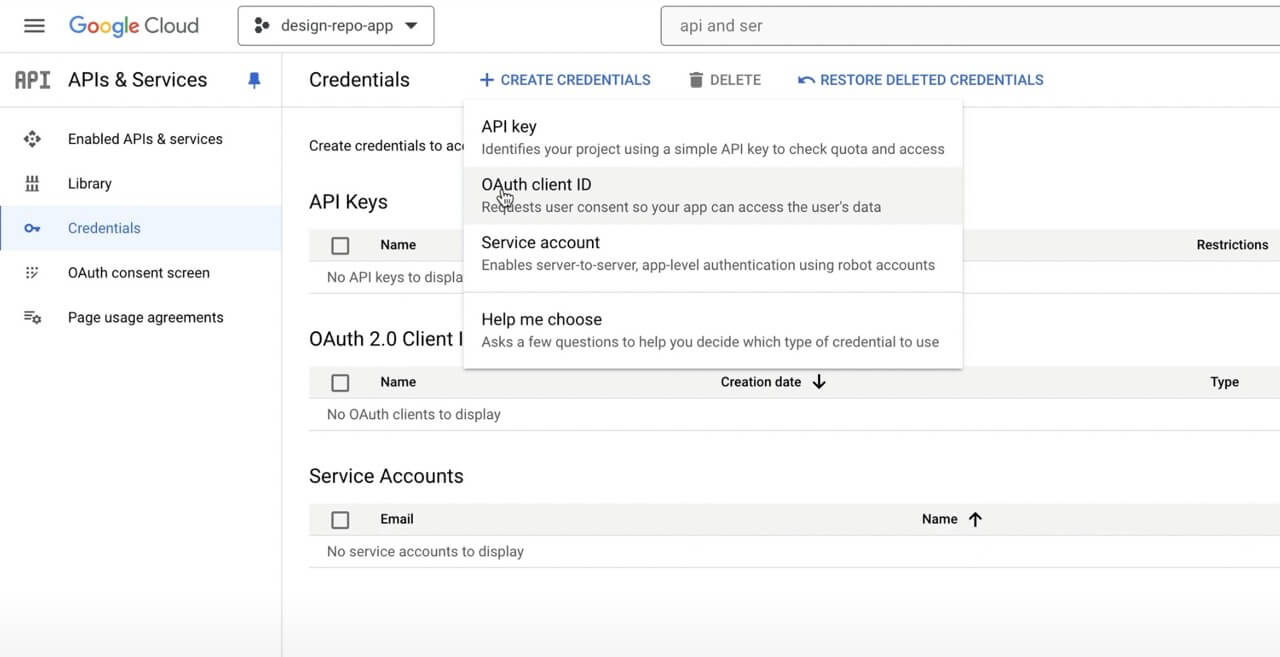
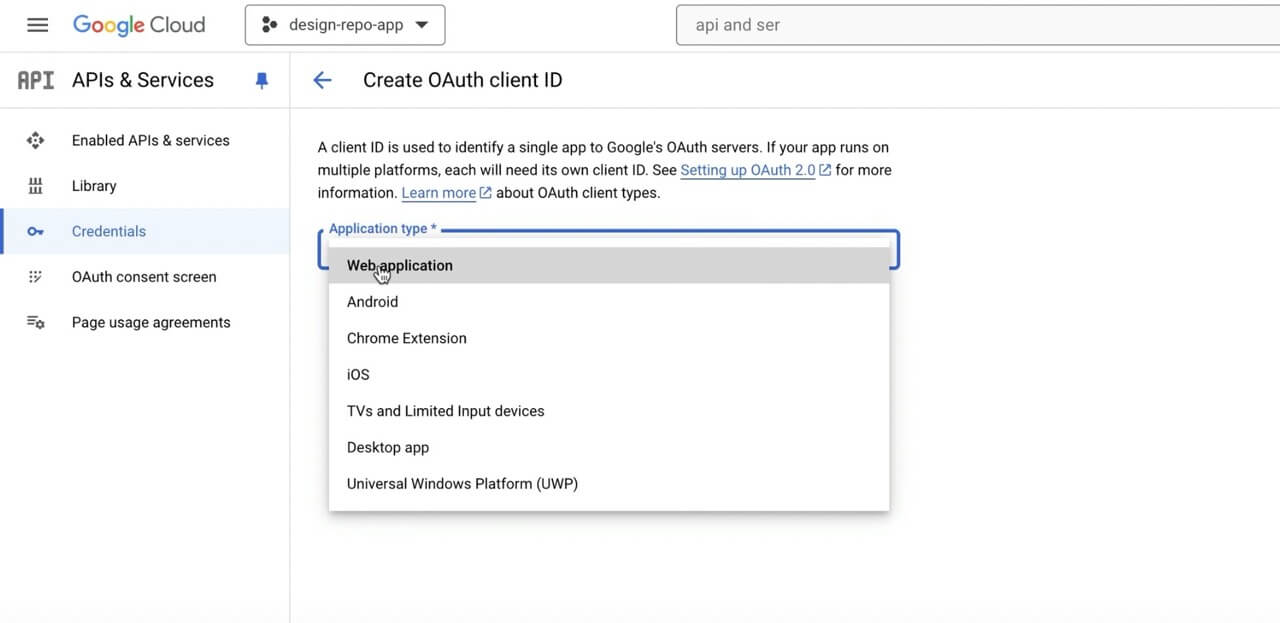
- Required Fields:
- Application type: Web application
- Name: Your app name
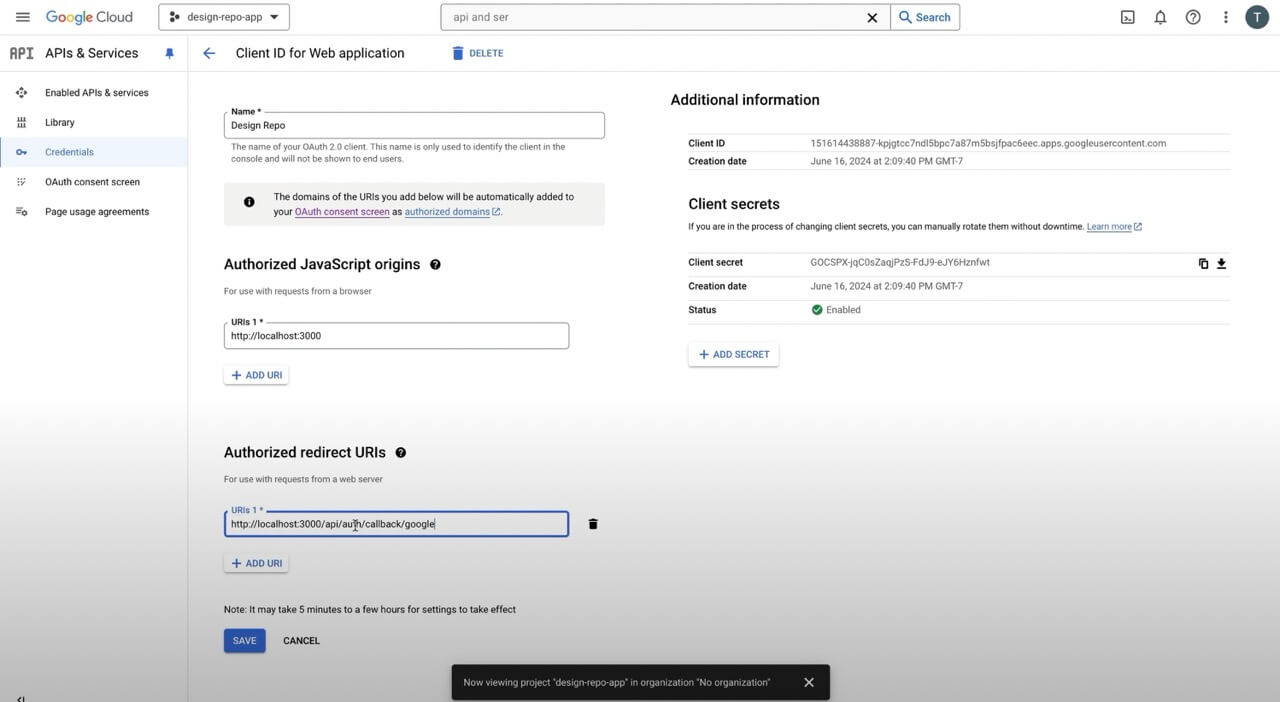
- Authorized JavaScript origins:
- Development URL: http://localhost:3000
- Production URL: https://yourwebsite.com
- Authorized redirect URLs: http
- Delopment URL: http://localhost:3000/api/auth/callback/google
- Production URL: https://yourwebsite/api/auth/callback/google
- Copy and paste credentials